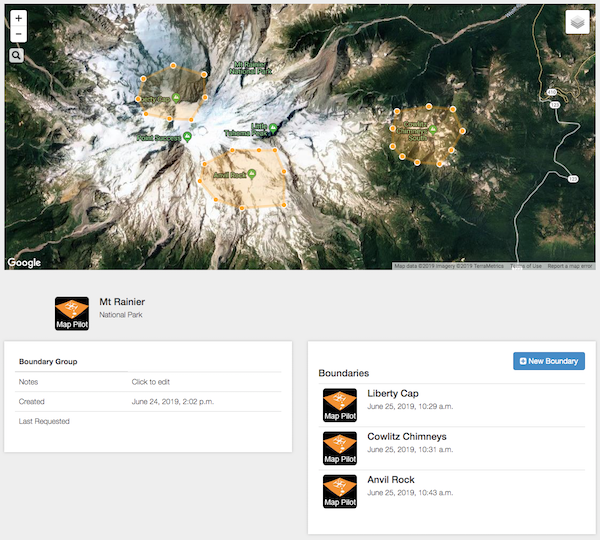
A Boundary is a polygonal set of points that define a survey area to be mapped. The Boundaries associated with a given Boundary Group will be shown when the Boundary Group's name is selected in the 'File Manager' screen in Map Pilot.
A Boundary is used in the creation of a Mission Plan when desktop-based planning is desired instead of using Map Pilot to define the survey area.
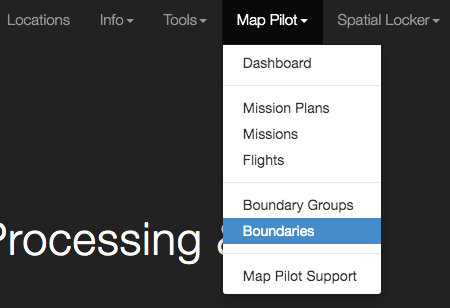
The Boundary and Boundary Group interface can be found in the 'Map Pilot' menu on the Maps Made Easy site.
New Boundaries can only be created from an existing Boundary Group Detail page by clicking the 'New Boundary' button in the 'Boundaries' section.
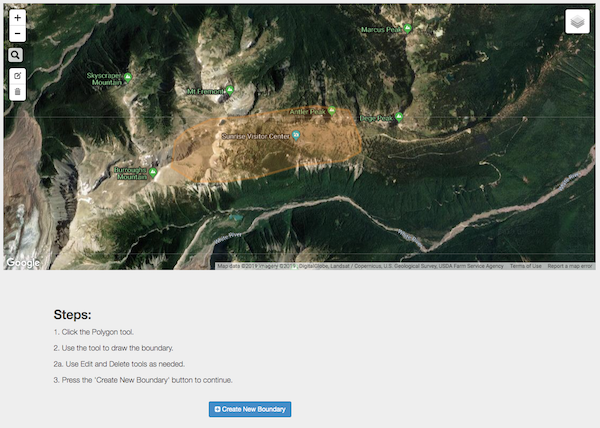
Steps
- Click the Polygon tool.
- Use the tool to draw the boundary.
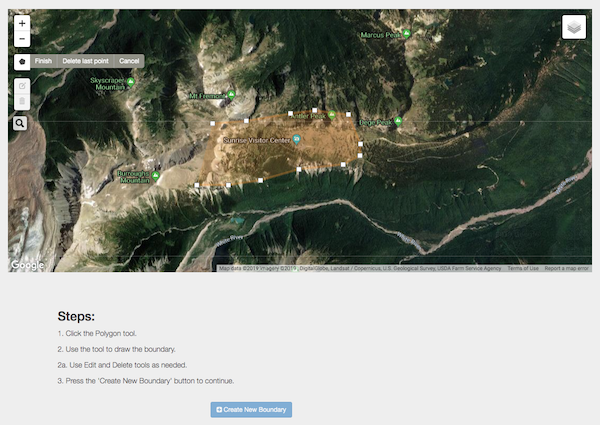
- Use Edit and Delete tools as needed.
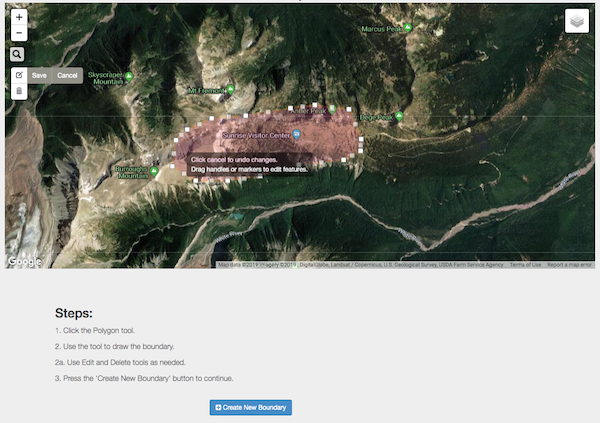
- Press the 'Create New Boundary' button to continue.
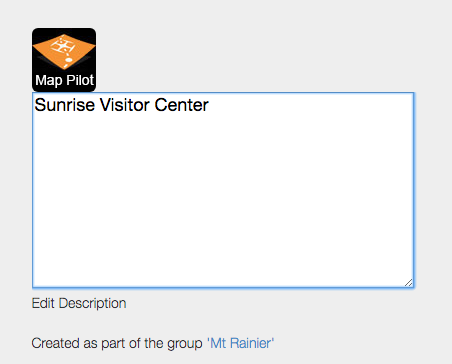
After creating the new Boundary you can edit it's name and description by clicking on the text that says 'Edit Name' or 'Edit Description' and entering the new value.
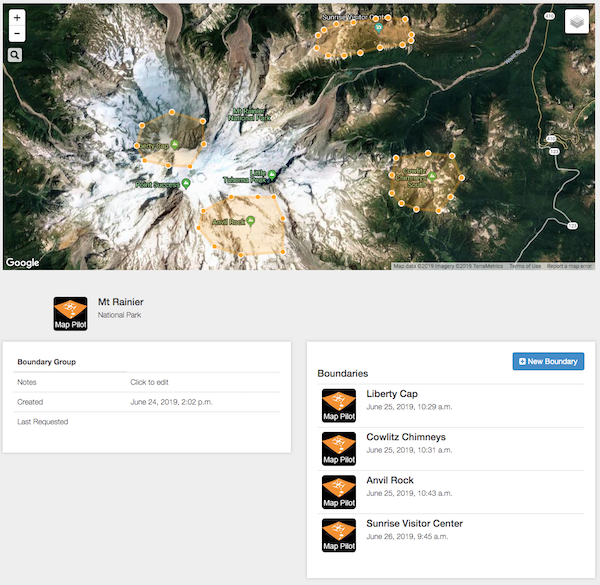
The new Boundary is shown in the list of 'Boundaries' for the Boundary Group. You can access the Boundary Detail by clicking on the icon in the 'Boundaries' list or under the 'Map Pilot' pulldown at the top.
Great article. I've created my Boundary Group and 2 Boundaries, how do I sync (or push) the Boundary Group to the File Manager in Map Pilot? I'm referencing Zane's response to this post:
https://support.dronesmadeeasy.com/hc/en-us/community/posts/360055202151-followup-on-editing-an-existing-save-flown-mission-
I'm logged in to MME within Map Pilot, Flight Sync is enabled, I'm connected to the Internet and have launched the flight layout screen.
For troubleshooting I've logged out of MME in MP, logged back in, restarted the app.
You guys are doing great work, keep it up.
Discussion moved to: https://support.dronesmadeeasy.com/hc/en-us/community/posts/360055537971-Using-Flight-Sync-to-push-Boundaries-to-Map-Pilot
You need to open the File Manager screen and hit the blue Sync button in the upper right corner. Also, make sure that Boundary Sync is enabled in the Settings.
Zane, got your reply.
This is all good stuff, but it makes it hard to define boundaries based on an ortho map with very few landmarks to go off.
Is there a possibility to load a .gpx into the Web app desktop side of it and display like what you currently use on the tablet app.
That way i can build the boundaries around the .gpx green line to speed building my flight plans.
Make any sense ???? :-)
You can also import KML and GPX files directly into the app.
Currently doing that.
But want to be able to do it when doing Boundaries on the web browser, to make it faster and more accurate.
Also means i can group the flights to make it easier to find the one i need.
Use the _boundary trick here and it will import directly into the app as a boundary. No dropping points required.
https://support.dronesmadeeasy.com/hc/en-us/articles/211429163-Opening-a-KML-from-Email
So you create a boundary in a boundary group. Not sure what the additional steps are for. How do you then create a grid pattern to fly within a boundary?
Why not just allow someone to select a boundary and then quickly create a flight pattern within that boundary? I'm doing all this online so as to sync it later to my tablet and load it offline to the drone out on the field.
The final layout is done on the app. You have to define the takeoff location.
Shouldn't my mission plans sync then to my laptop that I created online?
This is not creating a mission plan. This process describes the creation of a boundary. A boundary is synced to your device. On the device, you can define a mission plan which can be saved. There is no way to create a mission plan without a device.
Right I get that but if I create a boundary online, how do I find it in the app? Should it not sync? There is a "Boundary Sync" in the apps settings yet I don't see it in the app.
The boundaries show up as a section in the File Manager section where other imported files and shapes are displayed.
Ok understood thanks