Maps Made Easy is a software and services company that specializes in drone mapping and surveying. The company offers a suite of products that enable users to plan, execute, and analyze drone-based mapping missions.
The company's flagship product is its cloud-based photogrammetry software, which is used to process and analyze the high-resolution images captured by drones during mapping missions. The software can generate 2D and 3D maps, point clouds, and digital elevation models (DEMs) with high levels of accuracy and detail.
In addition to its software, Maps Made Easy also offers a range of hardware and services, including drone flight planning and execution, data processing, and data analysis. The company's mobile app, Map Pilot Pro, is a popular tool for drone pilots, enabling them to plan and execute mapping missions with ease.
Maps Made Easy's products and services are used in a variety of industries, including agriculture, construction, mining, and environmental management. The company is committed to delivering innovative solutions that enable users to collect, process, and analyze drone-based data quickly, accurately, and cost-effectively.
Maps Made Easy - Step by Step
This Quick Start guide will walk through the steps for taking aerial images and turning them into useful maps and 3D models.
The following topics will be covered:
- Source Data Preparation
- Job Submission
- Image Upload
- Processing
- System Notifications
- Results
- Making Measurements
- Output Types
- Map Sharing
For information on collecting the images, please visit our Map Pilot Quick Start guide for help in automatically collecting the source data.
Source Data Preparation
Maps Made Easy creates its maps and models based on carefully taken aerial imagery. Mapping data is generally taken by flying a serpentine pattern while taking periodic images as seen in the following screenshot from our Map Pilot app.
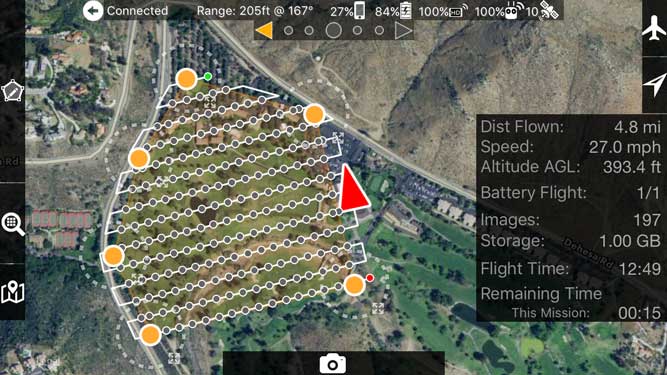
For our processing to give quality results, the submitted images must have a lot of overlap between successive images and adjacent passes.
Images taken with DJI drones, for example, are stored on the camera's SD card. In order to upload them to our service you will need to copy them off of the SD card to you computer.
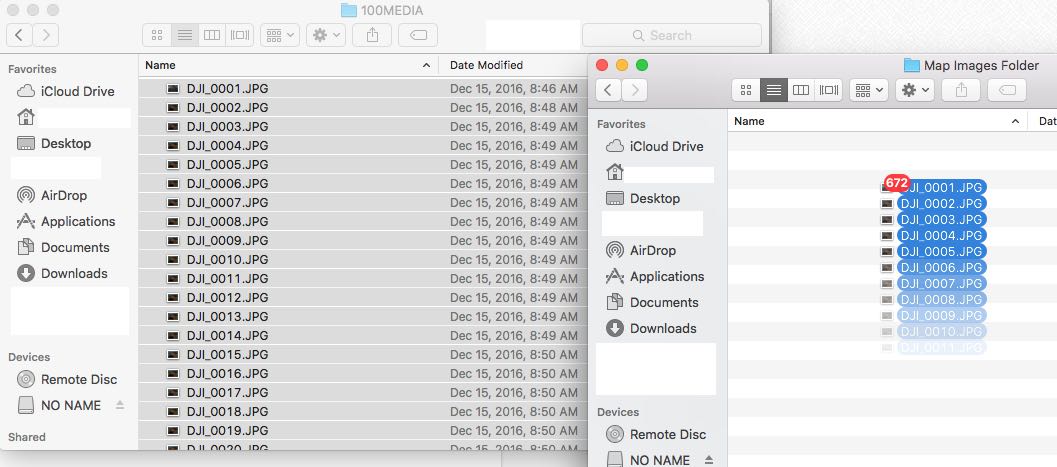
It is important NOT to use a photo importer like Lightroom or Photos or Photo Manager. Open the SD card in the file manager and drag the image files off the SD card to a local folder for safe keeping. Photo manager software frequently modifies the image's internal tags that are used for knowing where an image was taken.
If you don't have any images of your own yet and just want to try things out you can download this sample data set to follow along.
Job Submission
Assuming that you have already created and verified your account, now that you have some images (our sample data or your own) we can start the Job Submission process.
While it may seem like a lot of steps, it isn't a lot of work. There is no technical knowledge or background needed. Most of the steps are just to allow us to make sure things will work out well for you.
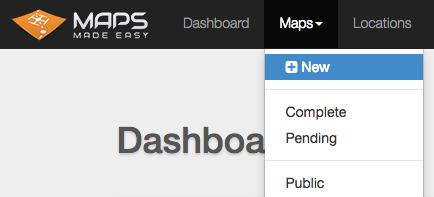
Once logged in you will be in your Dashboard which has links to all of your completed and pending maps as well as some information about your account's point balance.
To start making your first map, select New under the Maps menu at the top of the browser window:
Once on the Create a New Map page, you can select from a few different ways to submit your data. Since your imagery (and ours) is likely recorded by a drone that geotags the images, we will select the DJI Specific Workflow. This means that all of the positional information for the map will be read directly from the image files themselves. No manual inputs will be required. This can only be used with DJI camera images. Images from non-DJI cameras should be uploaded using the Classic Workflow.
The next screen will bring up a four step workflow that will guide you through the process and make sure that everything that is needed is entered. For each step there are a few boxes, some of which are optional. The box on the right will show how many processing points may be needed for your dataset or if your subscription quota will cover the processing on its own.
Step 1 - Select a Test Image
Select an image from the dataset you want to upload from your computer or Cloud storage location. This image will be inspected for having the appropriate tags to continue. If the image does not have appropriate tags the process will restart. If it does have the correct tag information you will automatically be moved to Step 2. The tag information will be displayed in Step 1 which can be inspected if needed.
Step 2 - Processing Options
Most users will accept the default settings of Normal Urgency, native resolution processing, automatic trimming and Flat Map Failover being enabled. If you want to add additional output types to the processing you will need to make those selections in Step 2. If you want to reduce the resolution of your processing to be able to process more imagery that must also be done in Step 2.
Step 3 - Name and Verify
Give the map a name so it can be identified in the system. You also must agree to the Data Collection guidelines and verify that you will review the charge in accordance with the terms before kicking off the processing.
Step 4 - Select and Upload
Click the box to select your images from the same data source that was used in Step 1.
Once the images have been selected the point calculation on the right side will be updated to show the total number of gigapixels you have selected for processing. This may result in no additional points being required if your subscription quota covers it. If points are required they can be purchased using the Pay-as-you-go system. You can go back to Step 2 and change the various settings to see how they affect the point total calculation.
Review the locations of the individual images using the map at the bottom. If there are errant images you can click on them to get their filename and then click the corresponding X next to it in the selected files list to remove it.
Once everything looks good click the blue 'Upload' button. You will see the progress for each image and the upload of the whole dataset.
Once the upload process is completed the processing will begin. If at any time during the upload you wish to cancel the job you can simply leave the screen without allowing it to complete.
Processing
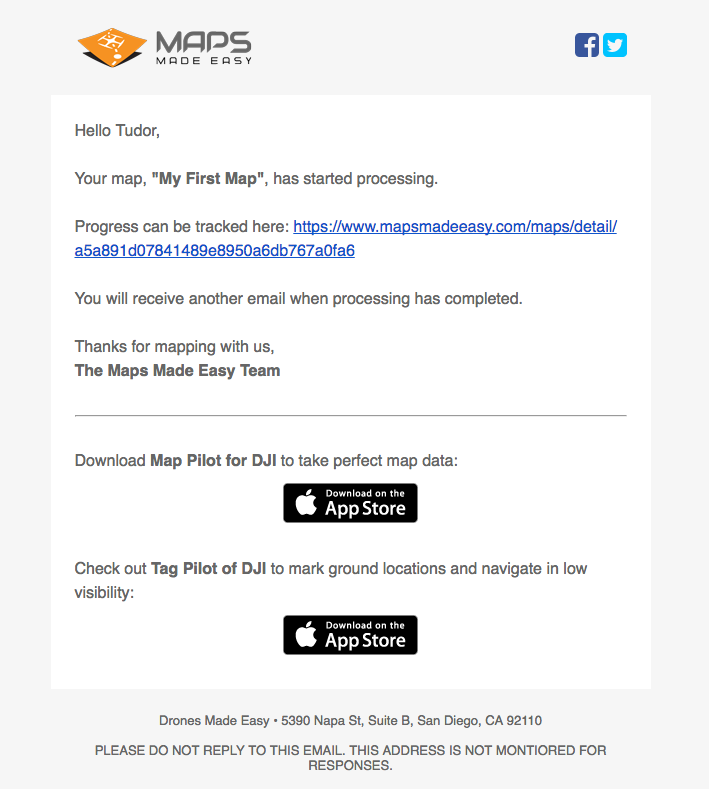
Once processing starts, the progress bar will be updated and an email notification will be sent. Note: that this job was started within minutes and did not take 24 hours to start.
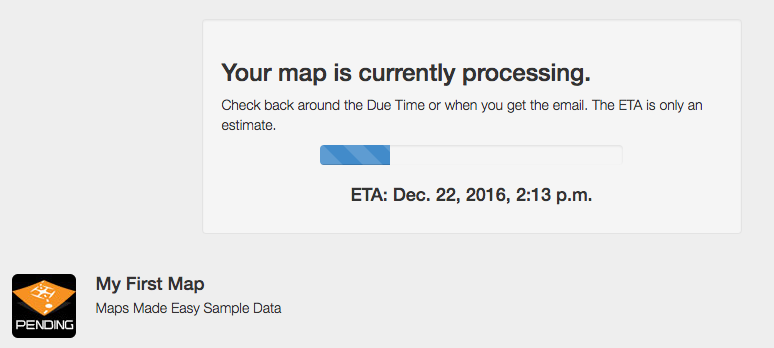
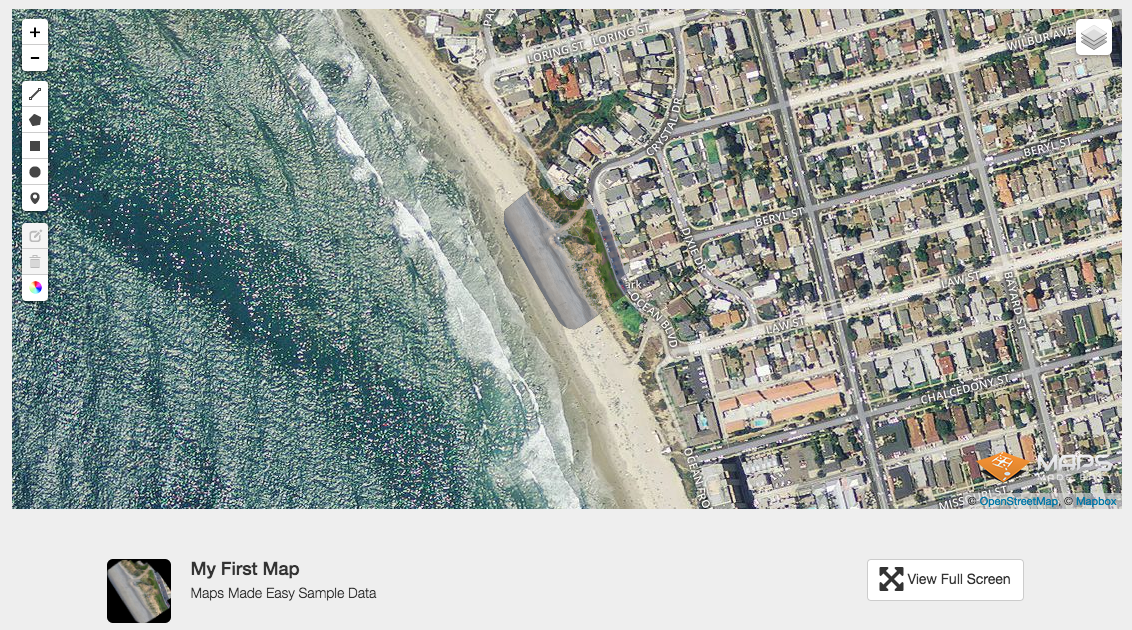
When the processing is complete, the progress bar goes away and the map shows up.
System Notifications
Once a job starts processing you get an email notification.
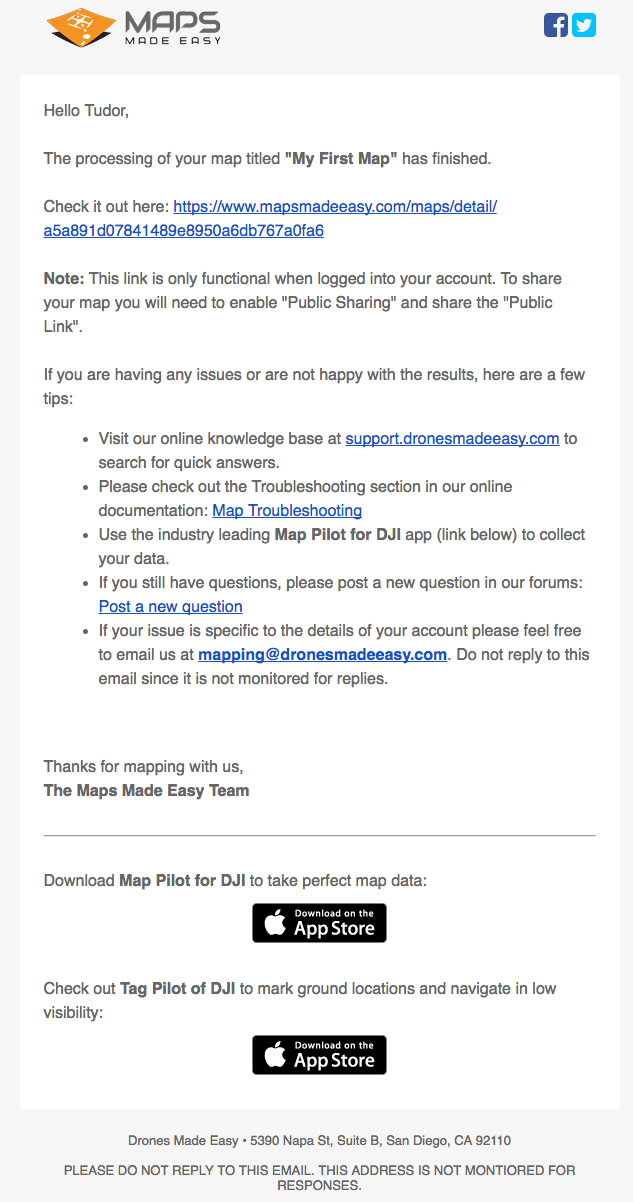
You get another one once the processing is complete.
Results
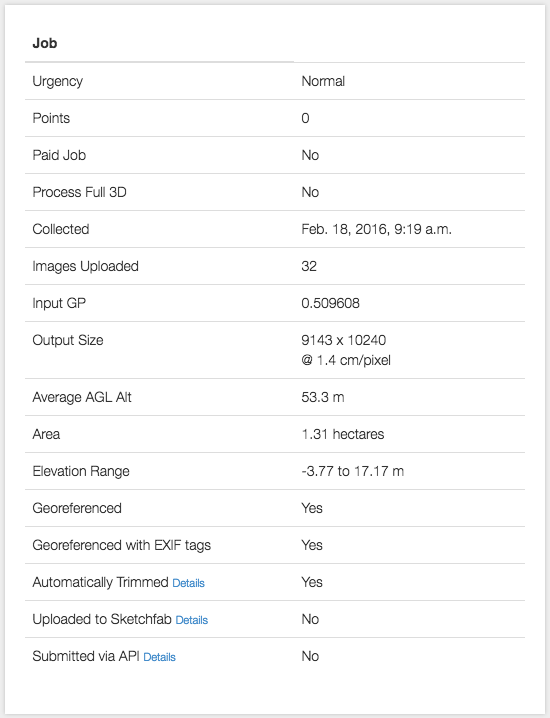
A Map Detail page is created for each map. It contains the following:
- A private version of the web map
- 3D model preview links
- Sharing controls
- Information on how the source data was collected
- A list of links to the output files
- Processing Timestamps
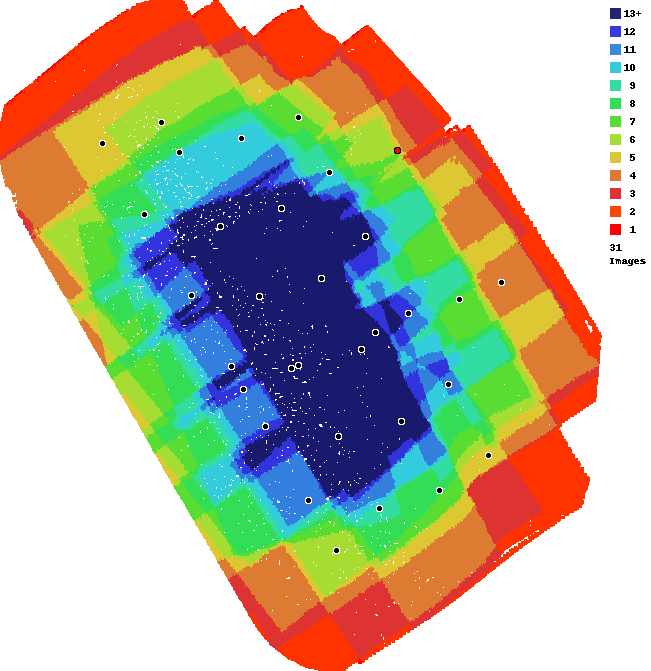
- An Overlap Report for diagnosing issues
This is an overlap report which can be used to diagnose image collection issues. You can read more about them here: Overlap Reports
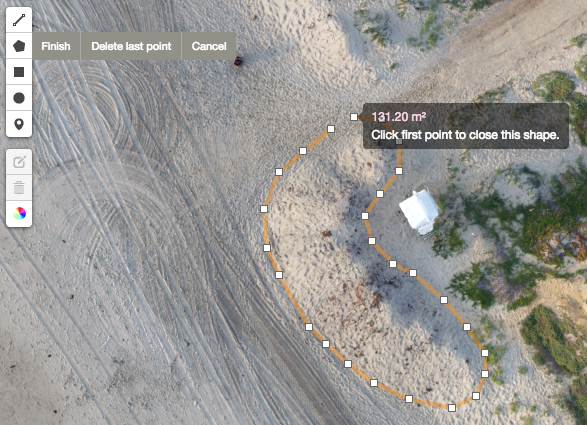
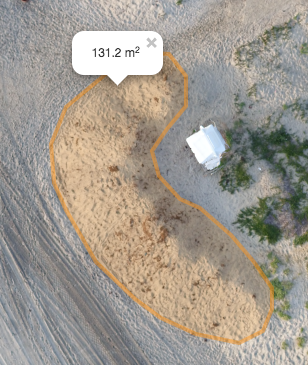
Making Measurements
Linear, area and volume measurements can be made directly in the browser using the embedded tools.
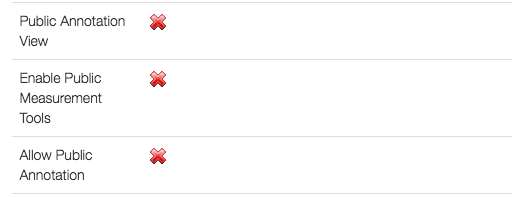
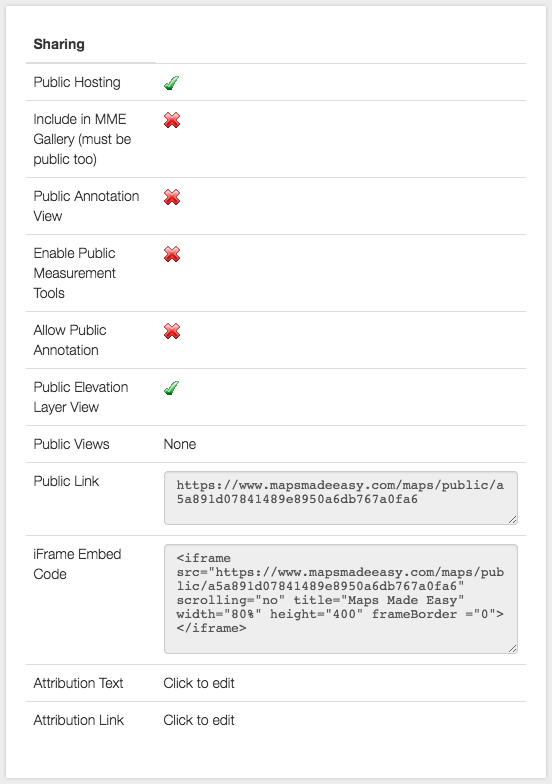
These annotations, tools and the ability to allow public markup is all controllable with checkboxes in the Sharing section.
NOTE: These tools are not available on touch devices.
Output Types
The main output for Maps Made Easy is the web map. Web maps enable a low bandwidth and low system resources view of what could potentially be a very large amount of data. It is not uncommon for a map that covers hundreds of acres at a high level of detail to come out to be a multi Gigabyte file. Very few computers can view that file but almost everything can view the web map. We maps can have multiple layers. By default we include an elevation layer to shows a colorized shaded relief map that shows changes in elevation quite dramatically. It is easily embeddable in your own site by using the Public Hosting control and the iFrame Embed Code.
These are live examples of a web map and 3D as made for the creation of this tutorial. Click around on them to interact.
A low resolution version of the created 3D model is also easily embeddable using the same controls for the 3D model.
Full resolution versions of the orthophoto map GeoTiff and various formats of the 3D model information are available for download.
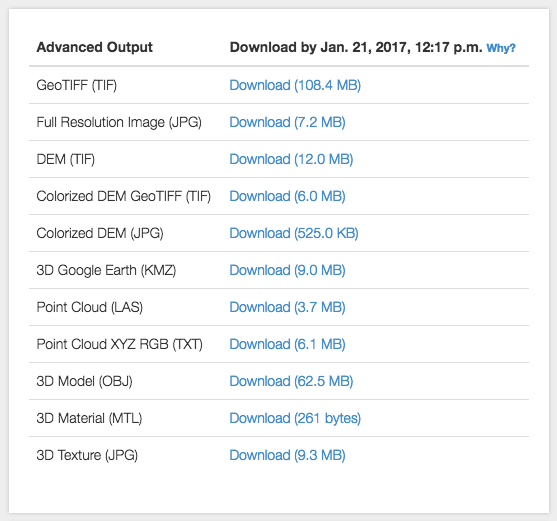
In order to keep the costs of processing and hosting down, the files in this list are deleted after 30 days. If you wish to automatically sync them with a Dropbox account you can do so by following these instructions.
Map Sharing
Controls for sharing or keeping various features private are part of the Map Detail page. For more information on the details of the sharing controls, please refer here: Sharing Controls
User created Walkthrough Video
Spanish Walkthrough
So - you support GCP for the images but not the surface models (las etc).. ??
Any plans to add this feature ?? Its all I need ..
I work in Civil 3d. After I submit the required photos, Can you deliver a product that will allow me to produce existing ground profiles, cross sections and design finish grades for regrading and removal of existing irregularities in a driveway?
Every job we process includes geotiff photo and DEM layers. The DEM layer is probably what you want to use for looking at ground profiles. Here is a link to creating a contour map with QGIS: https://support.dronesmadeeasy.com/hc/en-us/articles/217759823-Using-QGIS-to-make-custom-Contour-Maps