After finishing the Maps Made Easy (MME) workflow, a georeferenced stitched aerial image is available. Here at MME, we can only assert our GeoTiff to be as precise as the DJI drone’s GPS sensors, which is about 2-5 meters (6-15ft). For those that want more precision in their georeferenced orthophotos, we recommend using the QGIS (Quantum Geographical Information System) application. This will allow you to manually set landmark locations referenced against Google Maps (or another OpenLayer plugin) that can be much more precise.
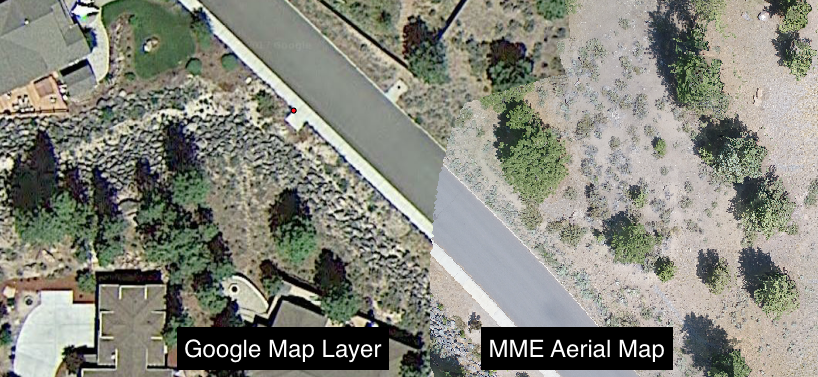
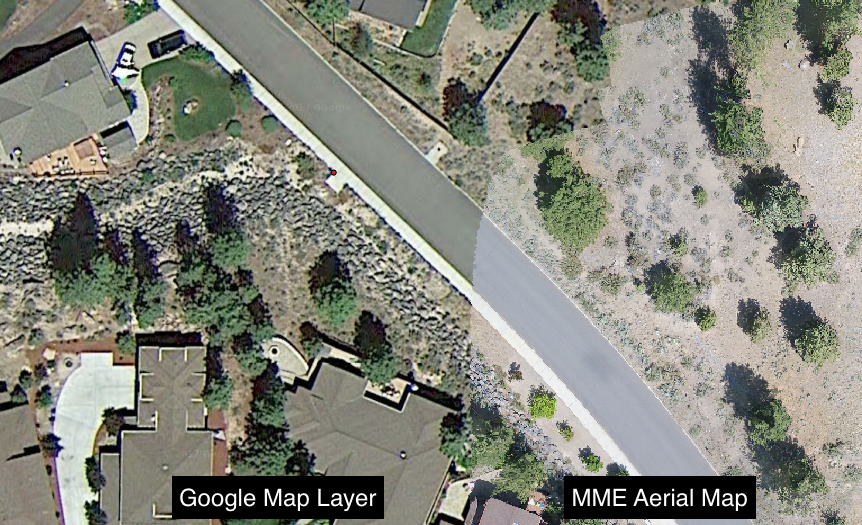
For this example, we have an aerial map that was processed with MME that does not quite meet our standards. Notice the brighter image is about a sidewalk's distance off from our google satellite reference data set. To fix this, we will re-reference our GeoTiff manually in QGIS.
1. Add a Google Maps layer to the Main View. This will be your "referenced" data set. To learn how, read the following tutorial: Google Maps Layer Setup
2. Pan/Zoom in the Google Maps layer to where you know your image will be referenced to.
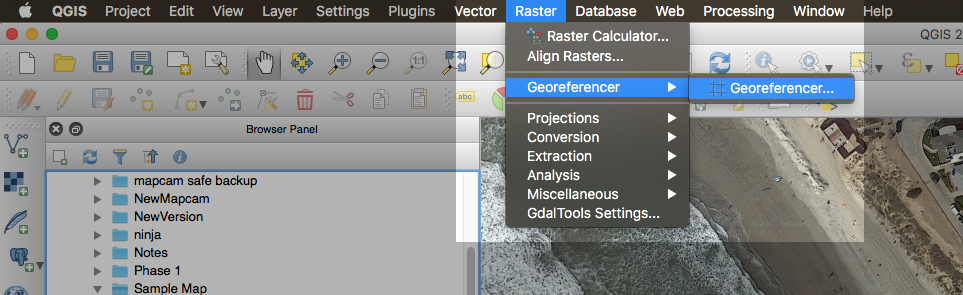
3. Go Raster > Georeferencer. (If this is not an option, go to Menu > Plugins > Manage & Install Plugins. Search for GDAL and make sure "Georeferencer GDAL" checkbox is checked.)
4. In the Georeferencer window, select the Add Raster button  in the top left corner. Select your image that you want to georeference. If it asks for the Coordinate Reference System Selector, select WGS 84 / Pseudo Mercator.
5. To georeference an image, you'll need to identify landmarks on both your aerial map and a referenced data set (our Google Maps plugin!). To do this, select ![]() on the top bar. Using the mouse, select a landmark on the image.
on the top bar. Using the mouse, select a landmark on the image.
Recommendations for landmark selection:
- Try to find intersections, like sidewalks, roads, sides of buildings, etc.
- Choose landmarks on the ground! Tall objects are seen at different perspectives then your orthophoto aerial map and will cause discrepancies in landmark coordinates that will skew your aerial map projection.
- Choose permanent structures. Remember: Google Satellite images are not current! Sandy beaches, cars, people, dirt paths, etc., are not good choices for landmarks because, chances are, you won't be able to find them in the referenced data set.
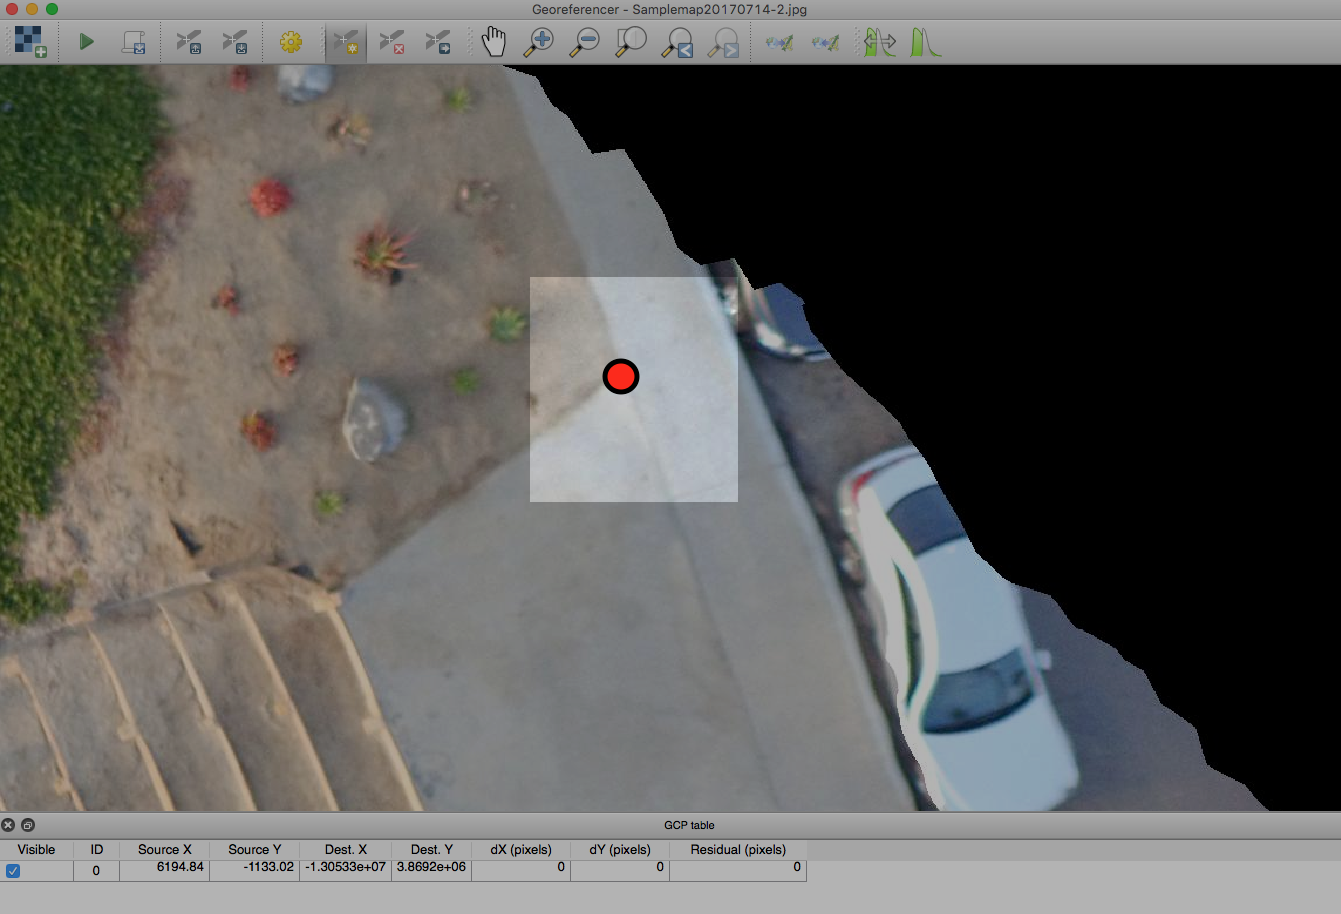
Example of using an intersection as a landmark
6. In the "Enter map coordinates" dialogue box you have two options. If you know the coordinates of your landmark (i.e. if you used GPS Markers while mapping), type them into the available text fields, then Skip to step (8). Otherwise, select to use the Google Map layer as a reference.
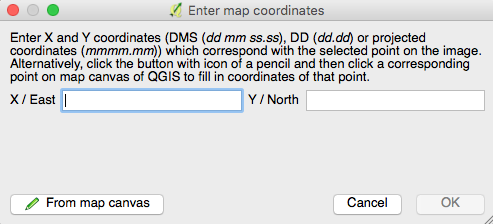
7. In the Google Map layer, select the same landmark using the cross hair. Once selected, the "Enter map coordinates" will reappear. Select OK.
8. Repeat landmark selecting for about 10 landmarks, the more the better! Select landmarks as far away from each other as possible.
9. Once you have your landmarks selected, go to Settings > Transformation Settings ...

10. In the settings window, we recommend the following:
Transformation Type : "Linear" or "Thin Plate Spline"
Resampling Method: "Lanczos" or "bilinear"
Target SRS : "Project CRS (EPSG:3857 Pseudo Mercator)
Compression : "LZW"
Output raster : yourFileName.tif <--(Make sure you choose a .tif for georeferenced file!)
Check box "Load in QGIS when done"
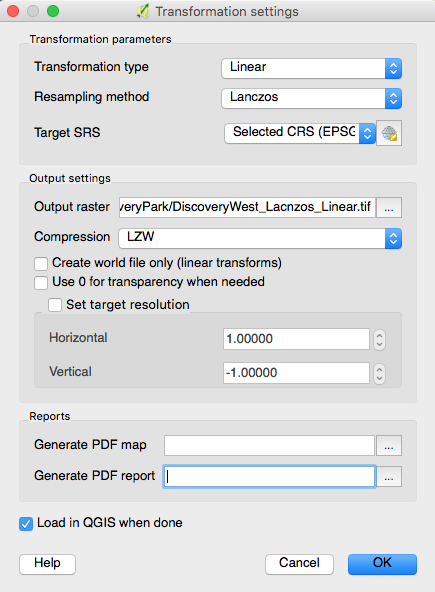
We chose a transformation type of Linear because MME maps are already transformed to turn aerial images into a stitched orthophoto. A Linear transformation only moves the image, it does not warp it any further. If you have a lower quality map, due to lacking photo overlap or Terrain Awareness, we recommend using Thin Plate Spline transformation.
The different types of resampling methods deal with varying algorithm complexity. Generally speaking, the more complex algorithm will produce higher quality results, but will take longer to compute. Bilinear is probably the best compromise, with Lanczos producing the best results.
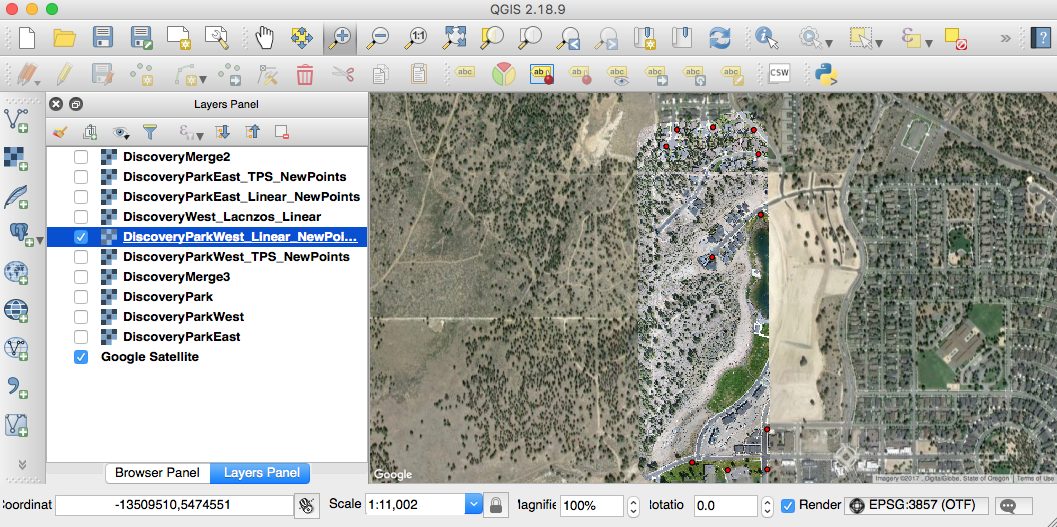
11. Select the  to begin the georeferencing transformation. Once complete, you should see the GeoTiff in your Layers Panel. This is what ours looked liked:
Lastly, here is our sidewalk misalignment location fixed with our manual re-referencing! Notice how the Aerial Map lines up with the Google Map layer.
This article is great, and helped me align my photo map to google earth. I'm wondering now how I can align my Colorized DEM, because I use that as another layer and run Composer outputs (in QGIS) that just swap out the photo for the colorized. Since I won't be able to see the points in the colorized DEM not sure how I would align it. Thanks.
The OpenLayers plugin unfortunately is not available or compatible with QGIS 3.0. I just installed it and followed your directions up to that point. It's not among the available plugins listed and the 1.4.8 version available at https://plugins.qgis.org/plugins/openlayers_plugin/ would not load; reported errors.
The OpenLayers plugin for use with QGIS 3.0 is now available.
It is OpenLayers plugin version 2.0.0 -- Get it via: https://plugins.qgis.org/plugins/openlayers_plugin/
I tried it today with QGIS version 3.0.2 -- and it worked.
As luck would have it, it was released on April 08, 2018 -- probably later in the day when you wrote your note.
Good news! I'll give it another try. I have Global Mapper 19 available and that worked well to georeferenced my distorted image with Google Earth reference points.